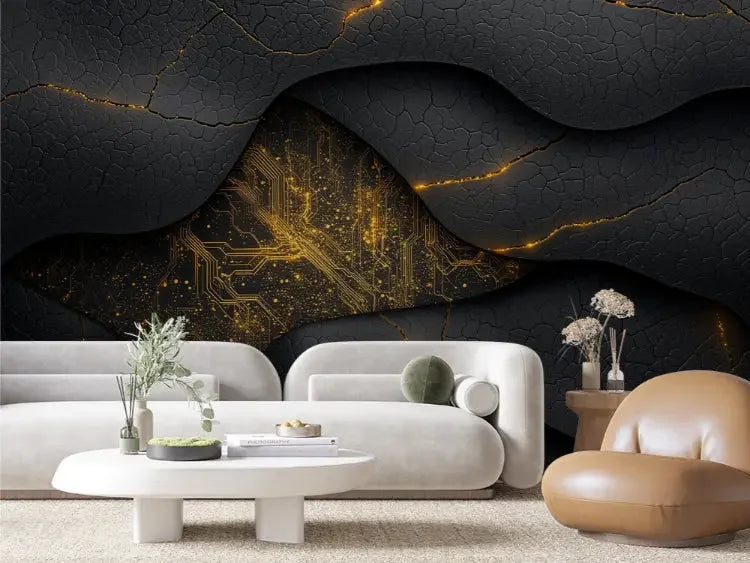
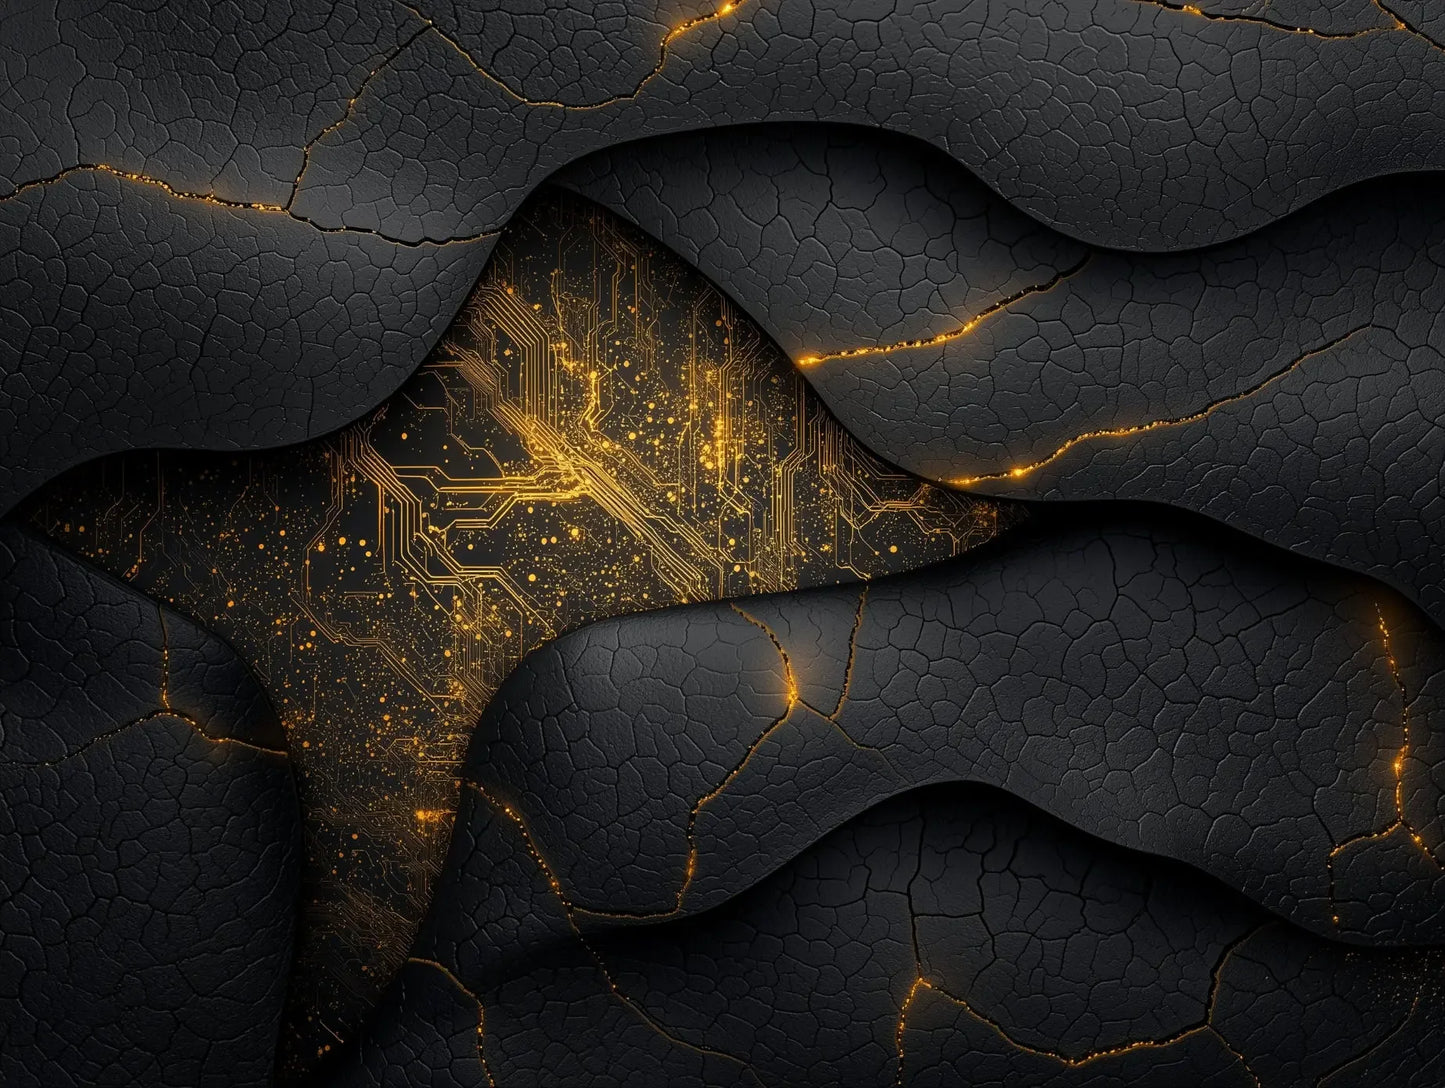
Golden Tectonic Circuit Breach Removable Wallpaper
Make a bold, modern statement with Golden Tectonic Circuit Breach. This removable wallpaper layers flowing, circuit-inspired lines in rich golden tones over a refined backdrop to create an artful, architectural rhythm on your walls—perfect for feature walls, entryways, living rooms, home offices, and creative spaces.
Crafted for style and sustainability, our wallpaper is PVC-free and printed with eco-friendly, water-based inks for a premium look that’s kinder to your home and the planet.
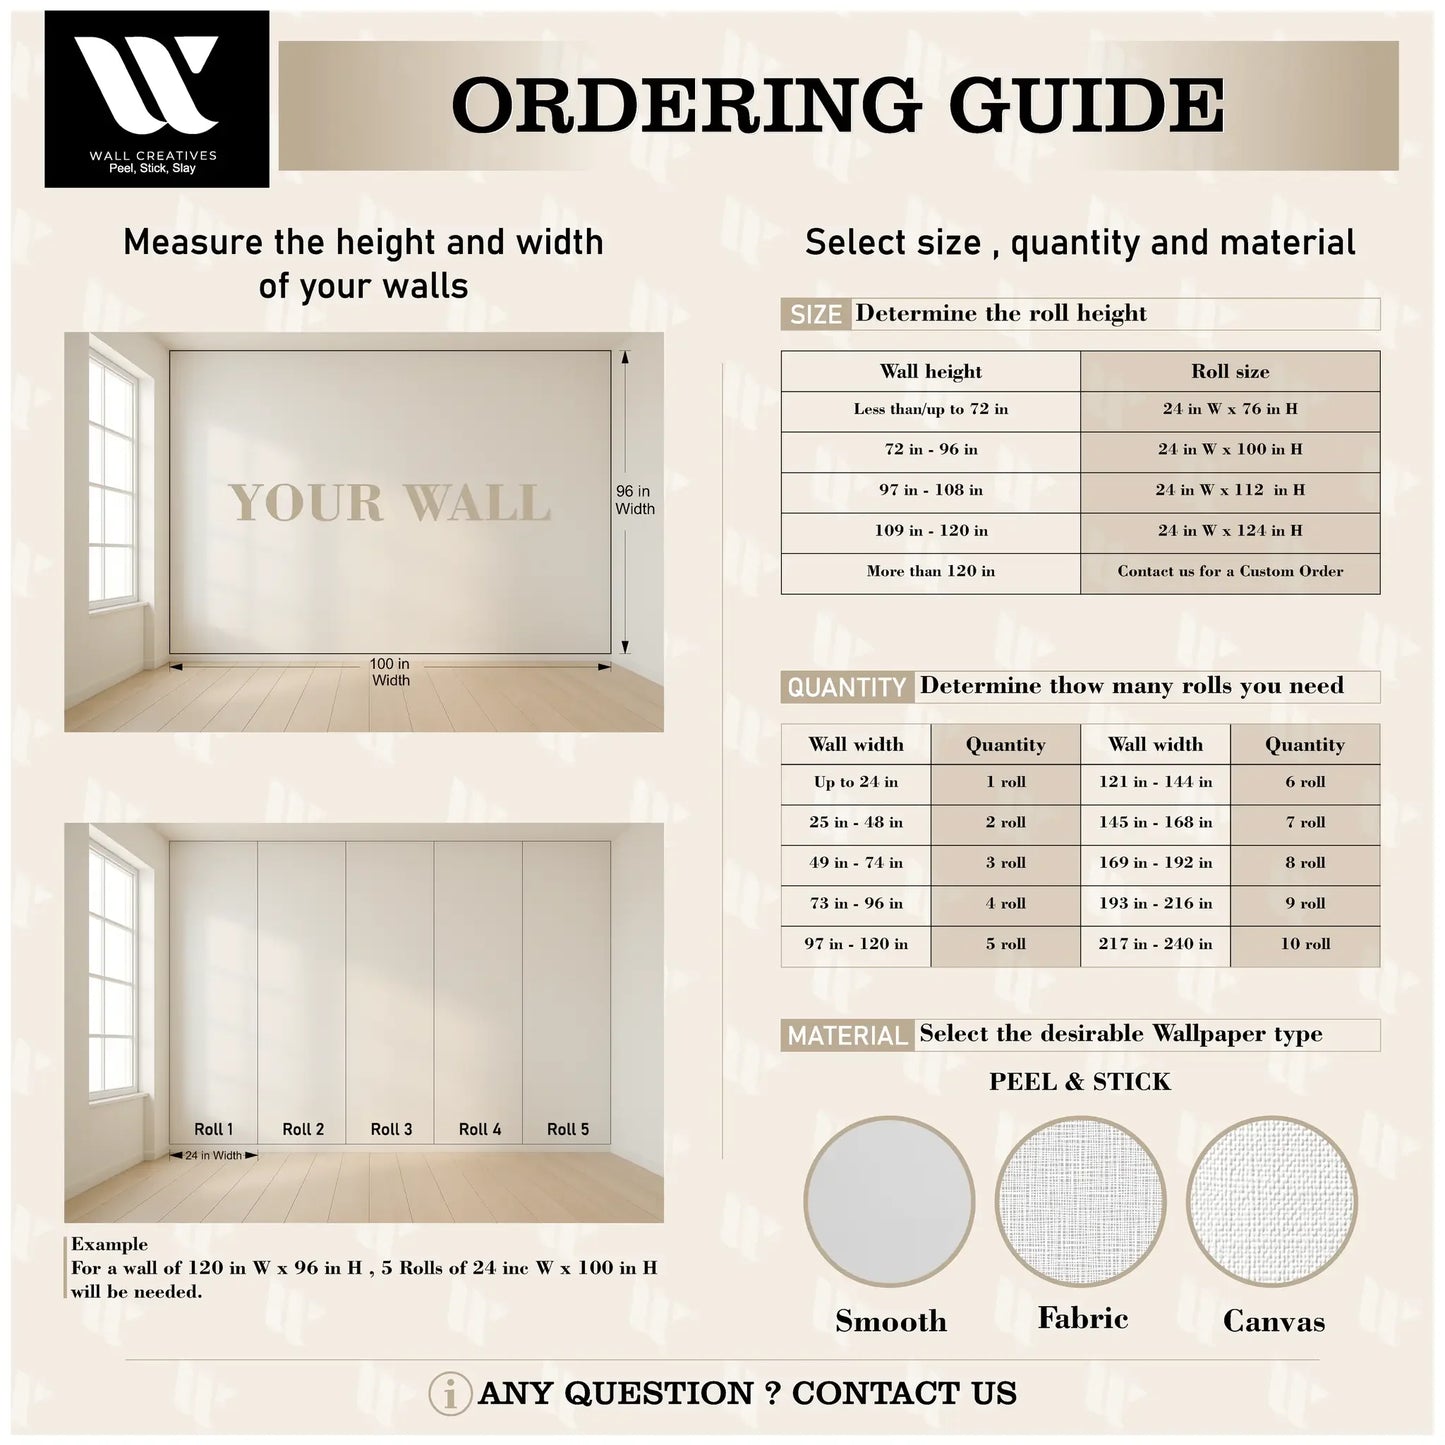
Size and Fit
Each roll is 24 inches wide and available in custom heights up to 120 inches. Order the number of panels you need to span your wall width; panels are designed to align for a continuous, seamless look.
Key Features
Removable, renter-friendly wallpaper designed for easy application and clean removal
PVC-free substrate printed with eco-friendly, water-based inks
24-inch wide panels for straightforward planning and installation
Custom heights up to 120 inches to fit your space with minimal trimming
Ideal for most smooth, painted, non-textured interior walls
Low-odor print process suitable for residential and commercial interiors
Care Instructions
Wipe gently with a soft, damp cloth; use mild soap if needed
Avoid abrasive scrubbers, bleach, and solvent cleaners
Keep dry; not recommended for areas with direct water contact
Allow newly painted walls to fully cure before installation
Installation Guidance
Prepare the wall: Ensure it is smooth, clean, dry, and fully cured. Remove dust, grease, and loose paint. Fill and sand imperfections for best results.
Plan your layout: Measure your wall height, then snap a vertical plumb line to keep panels straight. Start in the most visible corner or center of your feature wall.
Hang the first panel: Align the top of the panel with your ceiling line and the edge with your plumb line. Smooth from the center outward to remove bubbles.
Add additional panels: Align edge-to-edge, gently adjusting to maintain pattern continuity. Do not stretch the material.
Trim and finish: Using a sharp utility knife and straightedge, trim excess at ceilings, baseboards, and around outlets.
Settle and smooth: Re-burnish seams lightly after installation. If removing later, peel slowly at a low angle; warming the panel can ease release.
Note: Color appearance may vary by screen. For best adhesion and removability, install on smooth, properly primed, and fully cured walls.