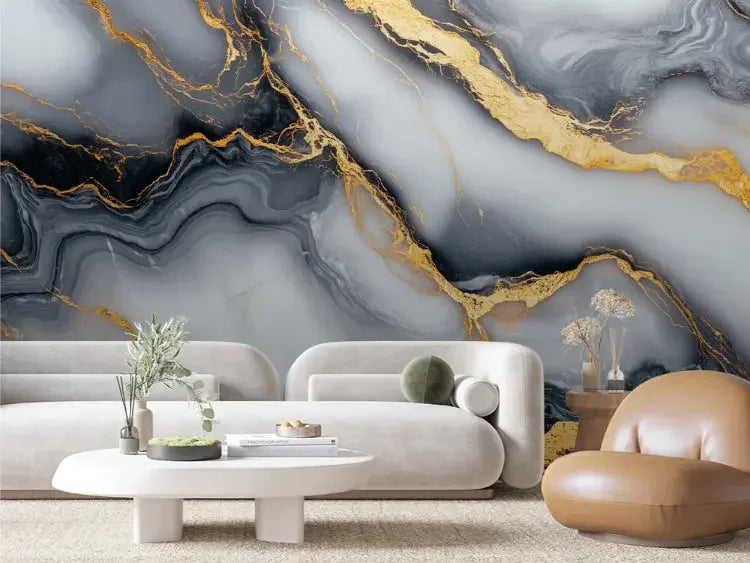
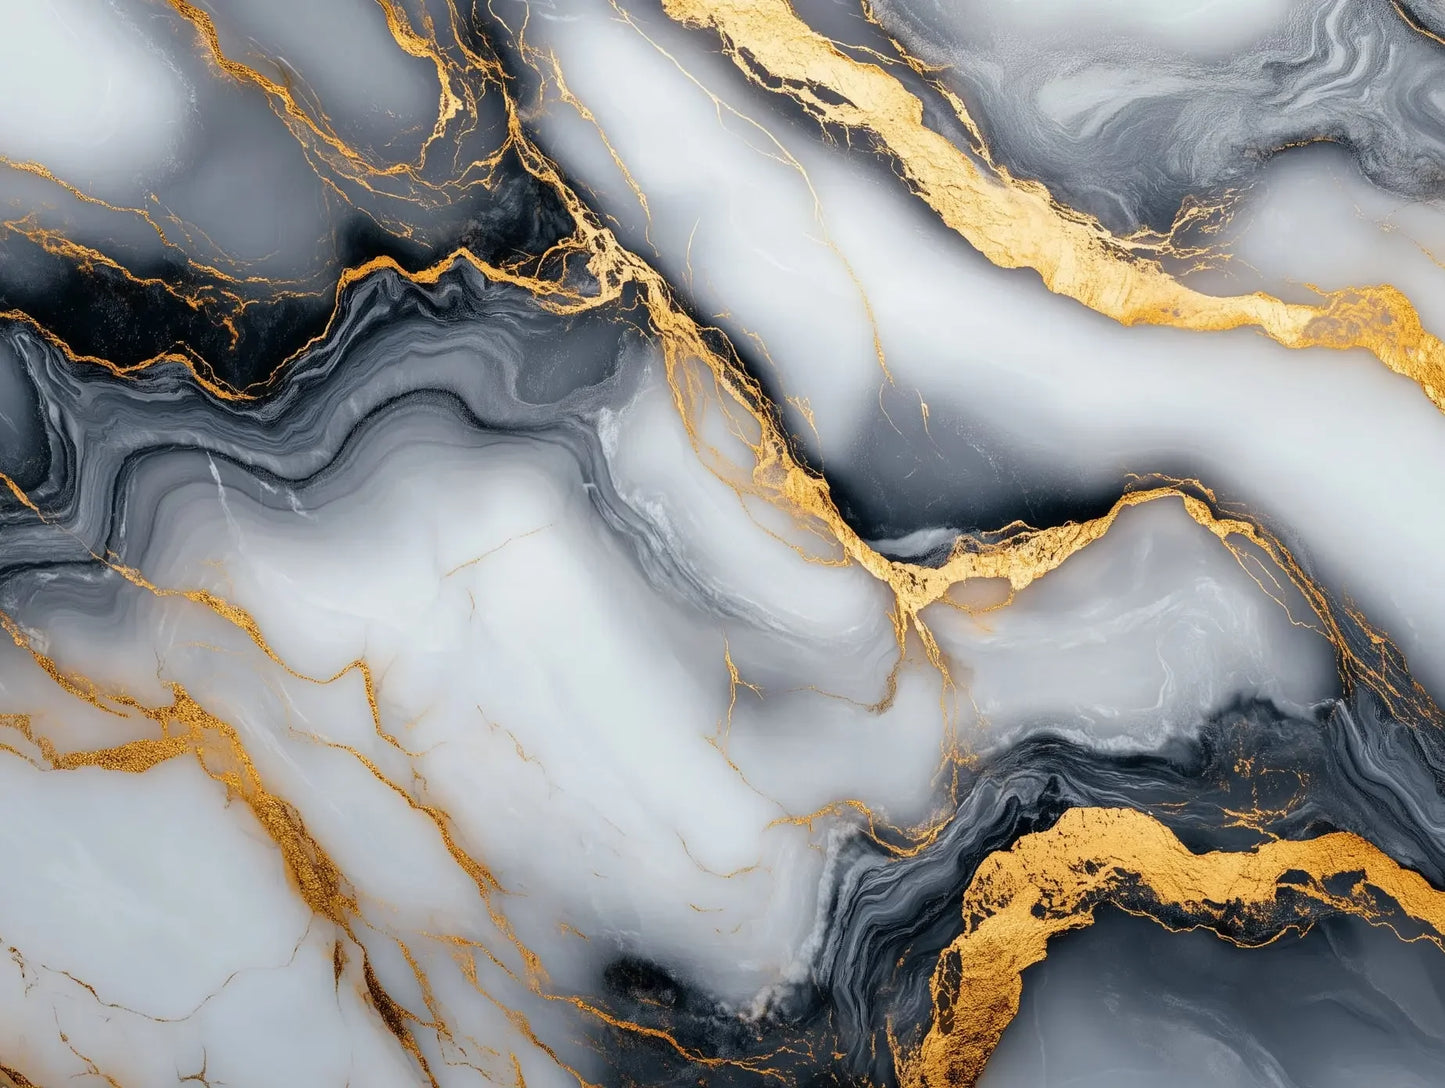
Inspired by the Japanese art of kintsugi, Kintsugi River Flow brings quiet movement and luminous “golden” seams to your space. This removable wallpaper flows like water across your walls, creating a calming, contemporary statement that suits entryways, bedrooms, dining rooms, and creative studios.
Key Features
Removable, renter-friendly wallpaper designed for easy application and clean removal on properly primed, smooth walls.
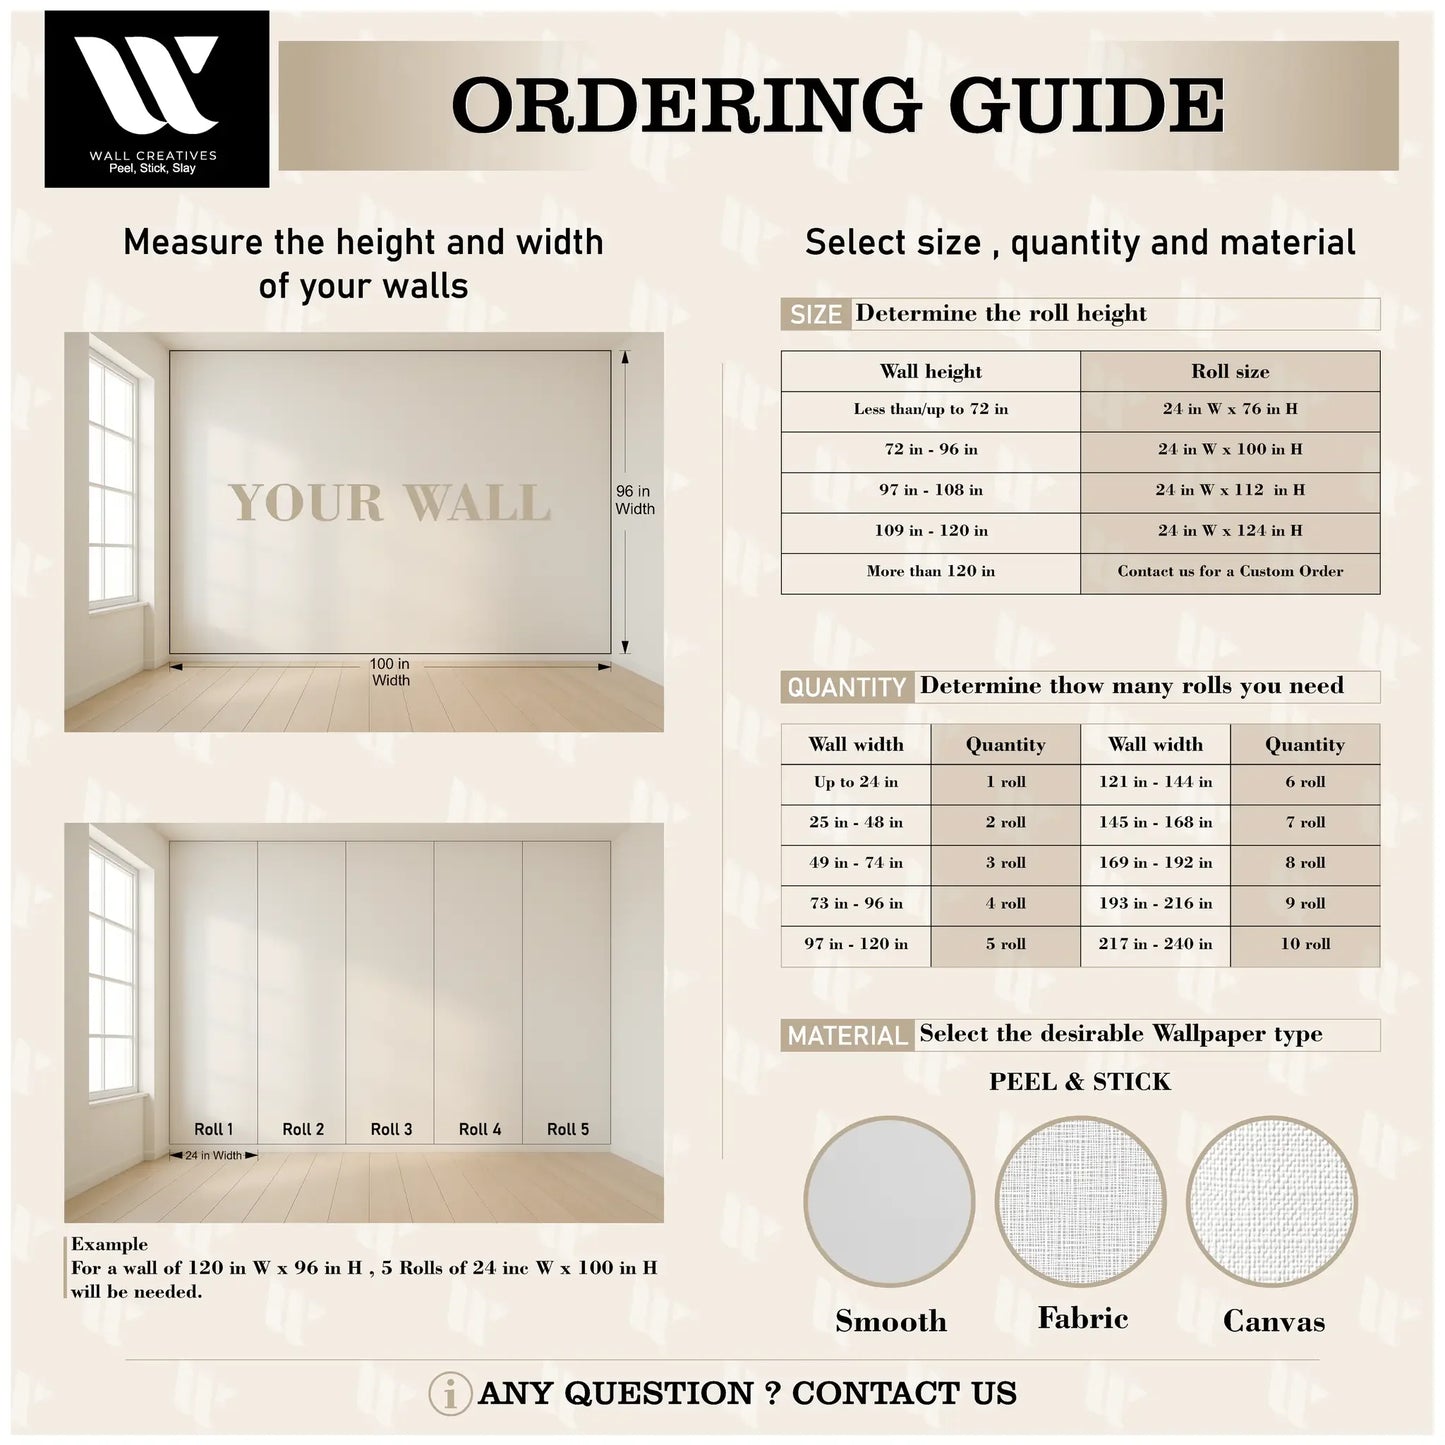
Rolls measure 24 inches wide and are available in heights up to 120 inches for floor-to-ceiling coverage.
Seam-to-seam pattern alignment for a continuous, gallery-worthy look.
Smooth, matte finish that reduces glare and mimics a painted surface.
PVC-free material, printed with eco-friendly, water-based inks.
Low-odor and safe for homes, studios, and nurseries.
Best on clean, dry, non-textured walls painted with a high-quality primer.
Care Instructions
Wipe gently with a soft, damp cloth; for tougher spots, use mild soap and water.
Avoid harsh chemicals, bleach, and abrasive scrubbers.
Not recommended for high-humidity or direct-splash areas like showers.
Protect from sustained direct heat and sharp impacts.
Before You Begin
Allow freshly painted walls to cure fully (typically 30 days) before installation.
Ensure the surface is smooth, dry, and free of dust, grease, or texture; gloss or satin finishes with primer yield the best results.
Measure your wall height and choose a panel height slightly taller than your wall (1–2 inches) for clean trimming at ceiling and baseboard.
Order all panels for a project in one batch for the best color continuity.
We recommend testing a small area if you have low-VOC, stain-resistant, or highly textured paints.
Installation Guidance
Prep the wall: Wipe down with a clean, damp cloth and let dry completely. Remove outlet covers and hardware.
Create a plumb guide line from ceiling to floor to keep the first panel perfectly straight.
Hang the first panel at the guide line. Adhere from the top, working downward in 8–12 inch sections. Smooth outward with a felt squeegee to release air.
Butt-join (do not overlap) subsequent panels, carefully matching the Kintsugi “veins” and river lines across seams.
Trim excess at ceiling, baseboard, and around fixtures with a sharp blade.
For removal: Gently lift a corner and peel back slowly at a low angle. If you feel resistance, warm the area with low heat; for pasted installations, lightly mist seams with warm water and allow to loosen before removal.
Note: Surface conditions and paint types vary. Proper prep ensures the best adhesion, clean removal, and a flawless finish.