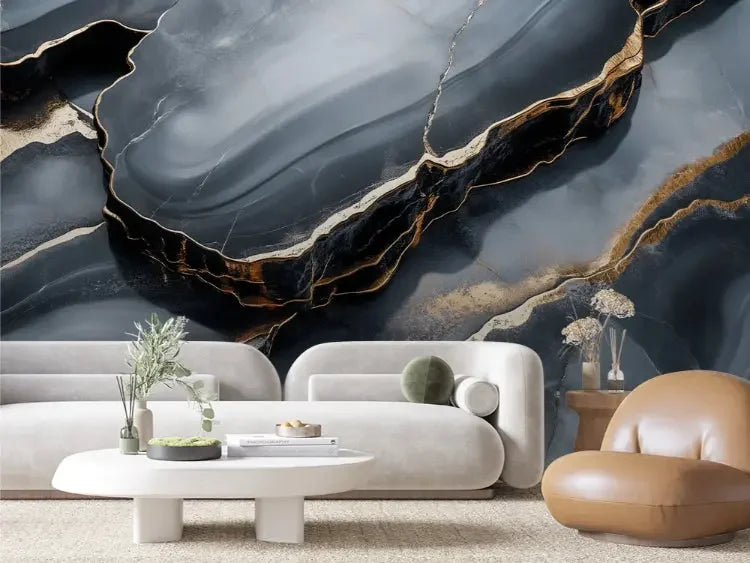
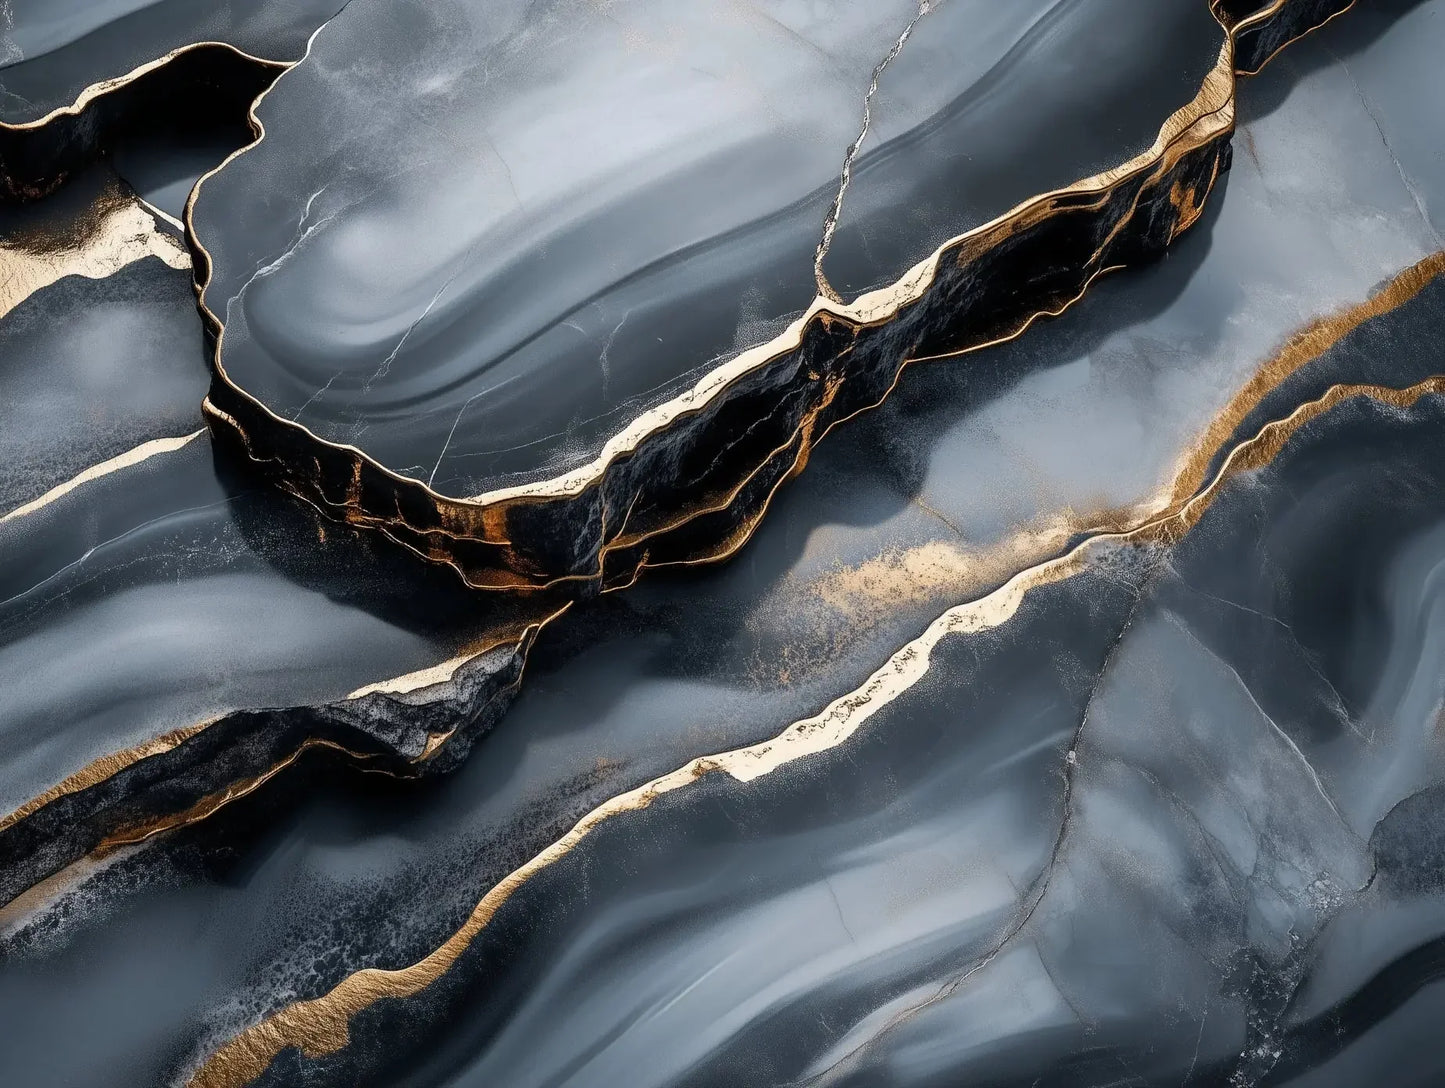
Bring modern calm to your space with a midnight-dark backdrop traced by artful “kintsugi” style linework. Midnight Kintsugi Fracture creates a refined, gallery-worthy feature wall while staying renter-friendly and easy to remove.
Key Features
Removable and renter-friendly: Low-tack adhesive allows clean removal from most properly painted, smooth walls.
Premium look: Soft-matte finish reduces glare and highlights the fine, gold-inspired fracture lines.
Sized for real rooms: Rolls are 24 inches wide, with heights available up to 120 inches for floor-to-ceiling coverage.
PVC-free: Printed on PVC-free material with eco-friendly, water-based inks.
Seam-matching design: Straightforward panel alignment for a continuous pattern across your wall.
Made to fit: Ideal for accent walls, entryways, bedrooms, home offices, and styled nooks.
Sizing & Coverage
Each roll covers 24 inches (2 ft) in width. Choose a height that meets or slightly exceeds your wall height (up to 120 inches) so you can trim cleanly at the ceiling and baseboard.
Measure the wall height and select the closest roll height equal to or greater than that number.
To find how many rolls you need: total wall width in inches ÷ 24, then round up.
Example: A 10-foot-high wall (120 in) that’s 12 feet wide (144 in) typically needs 6 rolls at 120 inches high.
Installation Guidance
Prepare the surface: Install on smooth, clean, dry, and fully cured painted walls. Avoid heavy texture, brick, or unsealed surfaces.
Plan your layout: Start from a plumb line on the left or the room’s most visible corner. Unroll panels and check the pattern sequence.
Apply the first panel: Peel 6–10 inches of the backing from the top. Stick and align to your plumb line, then smooth downward with a felt squeegee or soft cloth.
Finish the panel: Continue removing the backing while smoothing to avoid bubbles. Trim excess at ceiling and baseboard with a sharp blade.
Match and repeat: Align the pattern at the seam. Butt or slightly overlap edges as needed and continue across the wall.
Reposition as needed: Gently lift and reapply to perfect alignment. For removal, peel back slowly at a low angle.
Care & Maintenance
Dust or wipe with a soft, damp cloth; mild soap only if needed.
Avoid harsh cleaners, abrasive pads, and excessive moisture or steam.
Let freshly painted walls cure for at least 30 days before installing.
For kitchens and baths, use on smooth, dry walls away from direct water spray and high heat.
Eco Commitment
All of our wallpapers are PVC-free and printed with eco-friendly, water-based inks, delivering rich color and crisp detail with a safer, low-VOC profile for your home.